Using your phone number as the Caller ID for your outgoing calls is as easy as verifying your number using the
Verified CallerID aka Number Masking feature.
This feature is available on the Phone Numbers Page.
Add a Verified Phone Number via the Console
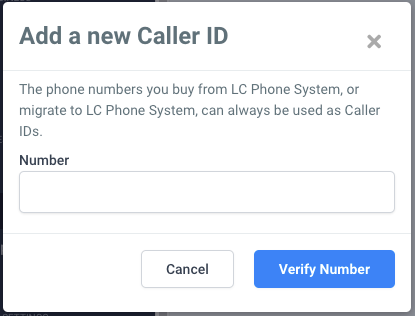
- 1. Access the Verified Caller IDs section in sub-account -> Settings -> Phone Numbers -> Manage
- 2. Click Add a new Caller ID!

- 3. Enter the desired phone number with the country to verify and click Verify Number.
- 4. You will see a six-digit OTP on the screen which you need to enter when you receive a call.
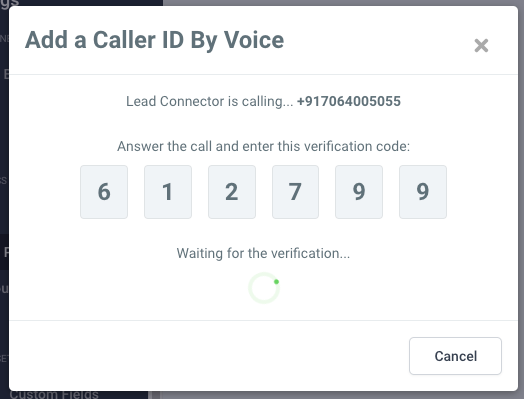
- 5. Your callerID will be verified and shown in the Verified CallerID list.

Use a Verified Phone Number for calling
- 1. Click on the edit icon for one of the Phone Numbers which would be available.
- 2. In the next screen enable the feature and select the callerID that needs to be linked to the number.

- 3. You are all set all the calls sent from the phone number will show the verified callerID instead.
📝
Note:
Verified phone numbers can only be used as a Caller ID for outbound Twilio calls. Incoming calls to the verified number will continue to route through the existing service provider (your wireless service, landline provider, etc.).