If you’re an insurance agent looking to automate lead nurturing, appointment scheduling, follow-ups, and client retention, Branning Bundles in Agent CRM are the game-changing tool you need.
Designed specifically for insurance professionals, Branning Bundles provide pre-built workflows, email and SMS sequences, and automation strategies that help agents close more sales and stay engaged with their clients—without manually chasing leads.
In this guide, we’ll walk through how to set up Branning Bundles, customize them for your business, and maximize their full potential.
“The goal with Branning Bundles is to help you guide the customer from step to step while maximizing the value of every lead you bring in. It’s incredible to see how the workflows handle follow-ups, reminders, and even referrals automatically.”
— Alex Branning
✅ Step 1: Import Your Branning Bundles into Agent CRM
Before using Branning Bundles, you need to import them into your account.
1️⃣ Log into Agent CRM
2️⃣ Navigate to Click & Play on the left-hand menu
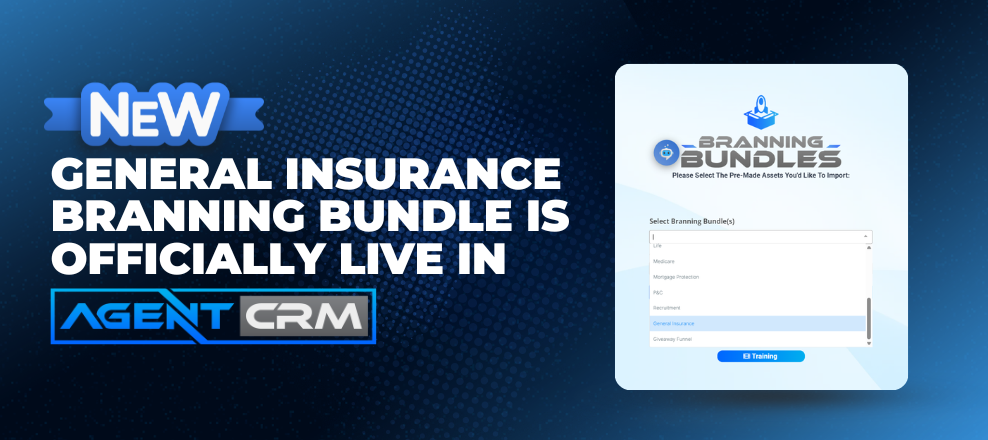
3️⃣ Locate the Branning Bundles drop-down and pick the Bundle(s) that fit your business
4️⃣ Click Import Bundle
Once imported, all associated workflows, forms, email sequences, and SMS campaigns will be available inside your Agent CRM account.
💡 Pro Tip: If you sell multiple types of insurance (Medicare, Final Expense, Annuities, Dental & Vision, etc), import all the relevant bundles to match your offerings.
✅ Step 2: Customize Your Branding in the Account Customizer
The Account Customizer ensures that every email, SMS, and automation inside your Branning Bundle reflects your brand identity.
📌 To access it:
1️⃣ Go to Customizer
2️⃣ Upload your logo, company name, phone number, and website
3️⃣ You’ll want to fill out all of the fields in the Customizer Form
Now, every pre-built email, text message, and landing page in your Branning Bundle automatically pulls in your branding details, saving you hours of manual editing.
💡 Why This Matters: Instead of editing hundreds of emails manually, the Customizer fills in the details for you instantly.
“Every single email and every single page on the funnel, both Medicare and IUL, have now been updated with my branding. I didn’t have to manually edit anything—just updated the Customizer, and the entire marketing engine changed in minutes! It’s amazing how fast and seamless it is.”
— John, Agent CRM User
✅ Step 3: Assign Branning Bundles Workflows to the Right Leads
Branning Bundles come with pre-set automations that categorize and nurture leads based on where they are in the sales process.
📌 Here’s how to assign leads to the right workflow:
1️⃣ Go to Contacts
2️⃣ Filter leads by tags, source, or stage (e.g., “New Medicare Lead”)
3️⃣ Click Add to Workflow and choose the appropriate Branning Bundle automation
For example:
🔹 Final Expense Leads → Added to the Final Expense Lead Nurture
🔹 Medicare Prospects → Enter the Medicare Lead Nurture
🔹 Life Insurance Clients → Moved to the Referral Request
📌 Pro Tip: Automate this step by setting up a trigger that assigns leads to the correct workflow as soon as they enter your CRM.
✅ Step 4: Review and Personalize the Email & SMS Templates
Each Branning Bundle comes with pre-written, high-converting email and text message sequences, but you can tweak them to match your voice and audience.
📌 To customize emails and texts:
1️⃣ Navigate to Marketing > Email Templates
2️⃣ Find the emails associated with your Branning Bundle workflows
3️⃣ Edit key sections, like:
- Greeting (e.g., “Hey there!” vs. “Hello [First Name],”)
- Call-to-action (e.g., “Book a call now” vs. “Schedule a free consultation”)
- Personal touches (e.g., mentioning specific policy types, coverage benefits, or client pain points)
💡 Why This Matters: Pre-written templates save time, but a little personalization helps boost engagement and conversions.
✅ Step 5: Track Performance & Optimize Your Campaigns
The Agent CRM Dashboard gives you real-time insights into how your Branning Bundle automations are performing.
If a workflow isn’t converting as expected, adjust your messaging or timing to improve results.
You can use the Branning Bundles automations, and collect leads on your current website.
💡 How to Maximize Branning Bundles for Different Insurance Niches (Examples)
For Life Insurance Agents
🔹 Use Branning Bundle automations to nurture leads over time, as many life insurance buyers take weeks to decide.
🔹 Send our pre-written education sequences explaining term vs. whole life policies.
For Medicare Agents
🔹 Automate follow-ups leading up to AEP (Annual Enrollment Period) to stay top-of-mind.
🔹 Create a workflow that sends a personalized policy review reminder each year.
For All Insurance Agents
🔹 Use the “Thank You” follow-up automation to encourage referrals from happy clients.
🔹 Automate reminders for policy renewals or additional coverage options.
🔹 Set up cross-sell automations (e.g., auto clients receive home insurance offers).
🚀 Start Using Branning Bundles in Agent CRM Today!
Branning Bundles are designed to save you time, automate lead nurturing, and keep clients engaged—all while making sure no lead falls through the cracks.
If you haven’t set up your Branning Bundles yet, follow the steps above and start automating your insurance business today!
👉 Not using Agent CRM yet? Start your 14-day free trial today at www.agent-crm.com and see why agents are switching to Branning Bundles!